
Bathrooms: Beautiful new ones majorly help sell homes. Gross outdated ones are problems – expensive ones. Tile, fixtures, and re-plumbing…not cheap and not exactly DIY unless you’re much more talented than we are. My basic opinion on bathrooms are: clean, lots of white, plenty of new towels, a window, and functional plumbing. When we bought this home it was a 2.5 bathroom house. Every bathroom was, if I’m being honest, in pretty icky condition. The ray of positivity which I clung to was this: each bathroom has a window. I want fresh air access in my bathroom and I also get super chlaustrophobic in a room without a window. Way too much time is spent in a bathroom to not have some daylight in my opinion. The downstairs bathroom was the best out of the three so we decided to leave it alone for the time being. Our plan was to remodel this in a year or two (funny cause it’s entirely gutted at the moment).
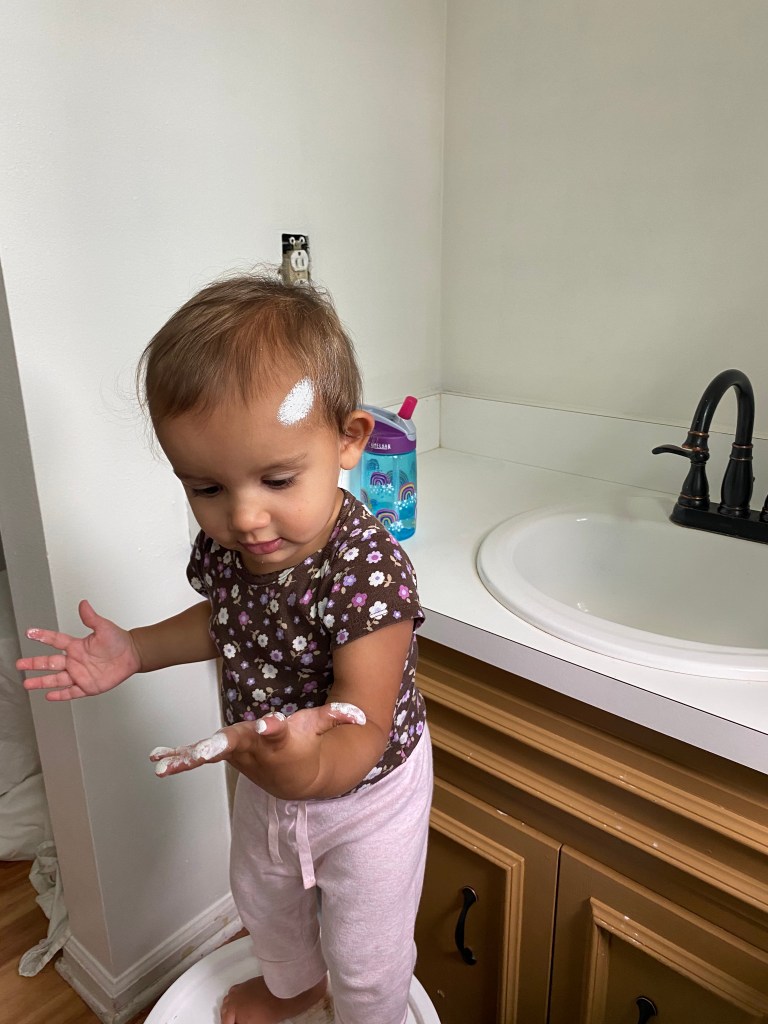
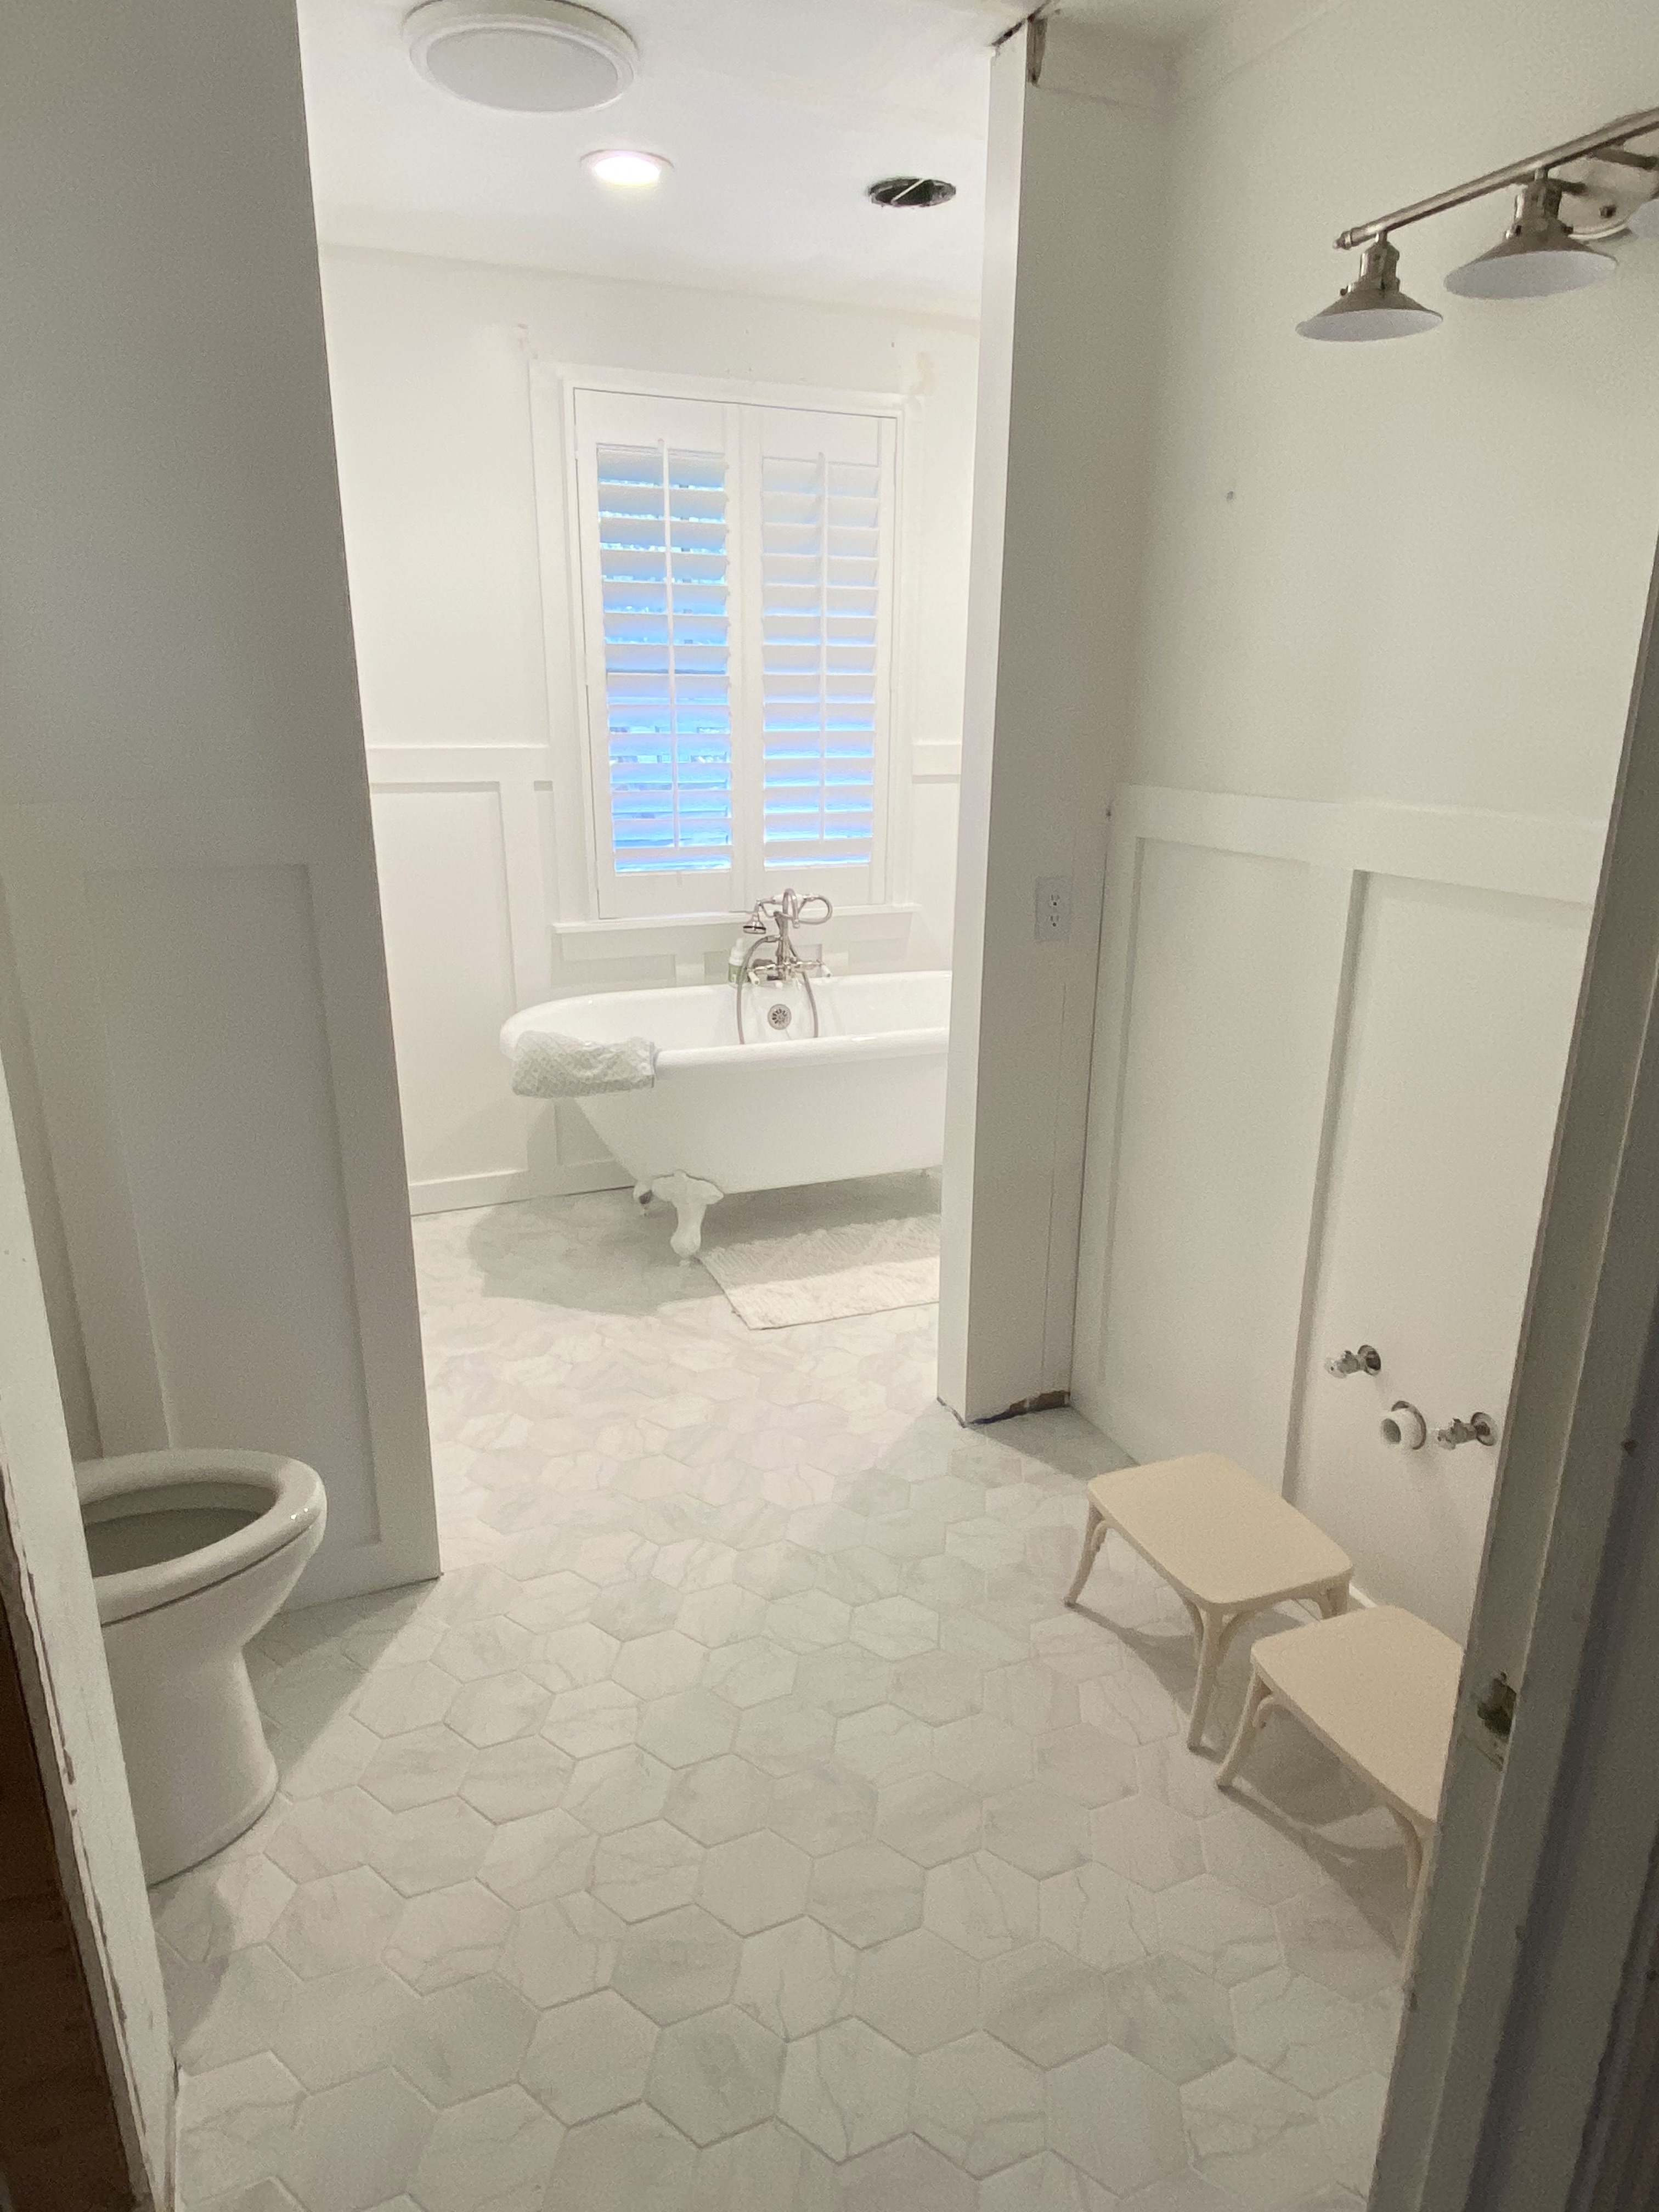
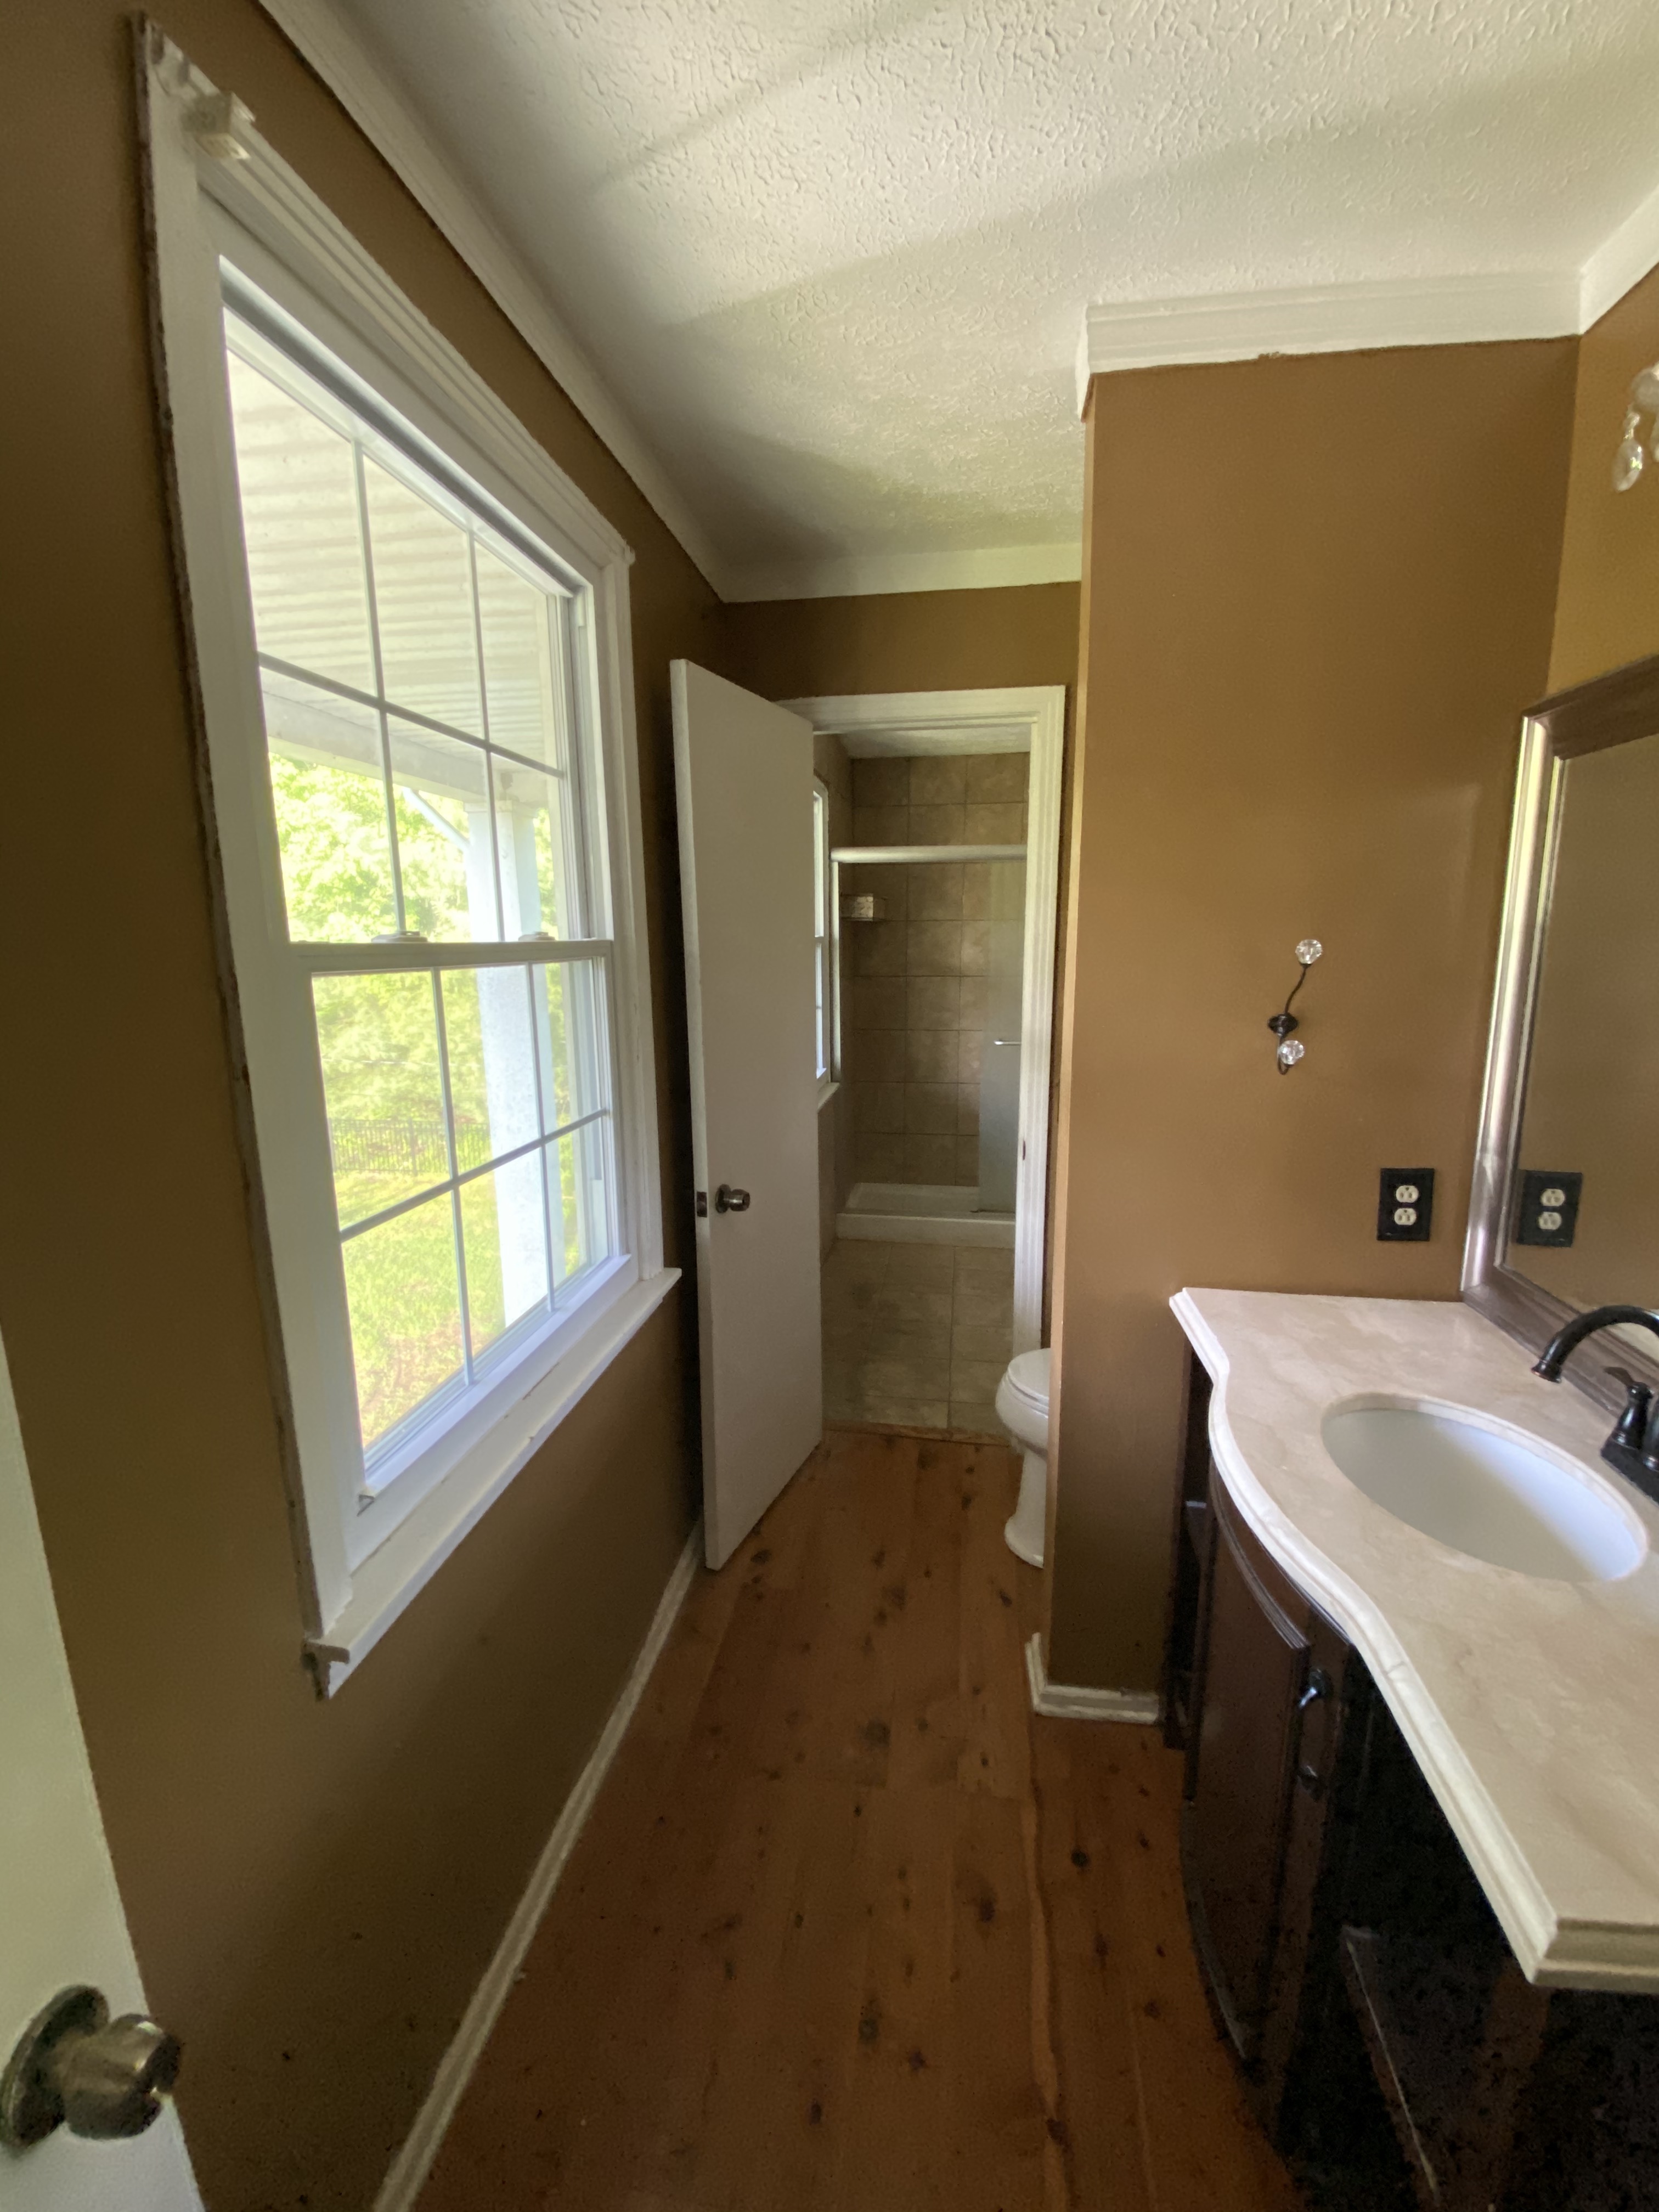
The bathroom projects began with the upstairs 1.5 bathrooms which I’ve referred to before as an odd “jack and jack” situation. You’ve heard of a “Jack and Jill” setup which I’m a huge fan of – a bathroom that opens on each side to different rooms. Well ours was a main bathroom off the hallway with a sink, toilet and shower, and then another door to the side opening to another toilet and single sink which was the “master”. So the master bath, funny enough, had no bath. There was a walk-in closet adjacent to the sink, which was only accessible via the bathroom area (musty and damp..yuck!) To top off the negatives here, there was no bathtub upstairs…not really a workable situation for a family with small kids all over the place getting filthy as we speak. So these bathrooms got completely gutted. The girl’s bathroom layout stayed pretty much the same, except we installed a clawfoot tub in front of the window (shower used to be against the wall to the right). We opened the center wall up a bit, the vanity was pulled out and we are installing a Kohler double trough sink in the same place. The toilet got replaced in the same spot. This space is about halfway finished at the moment. The wainscot is still a work in progress, I have some painting to do, trim is not finished, and the girls currently wash their hands and brush their teeth in the bathtub. Hey, they have running water and should be very thankful.

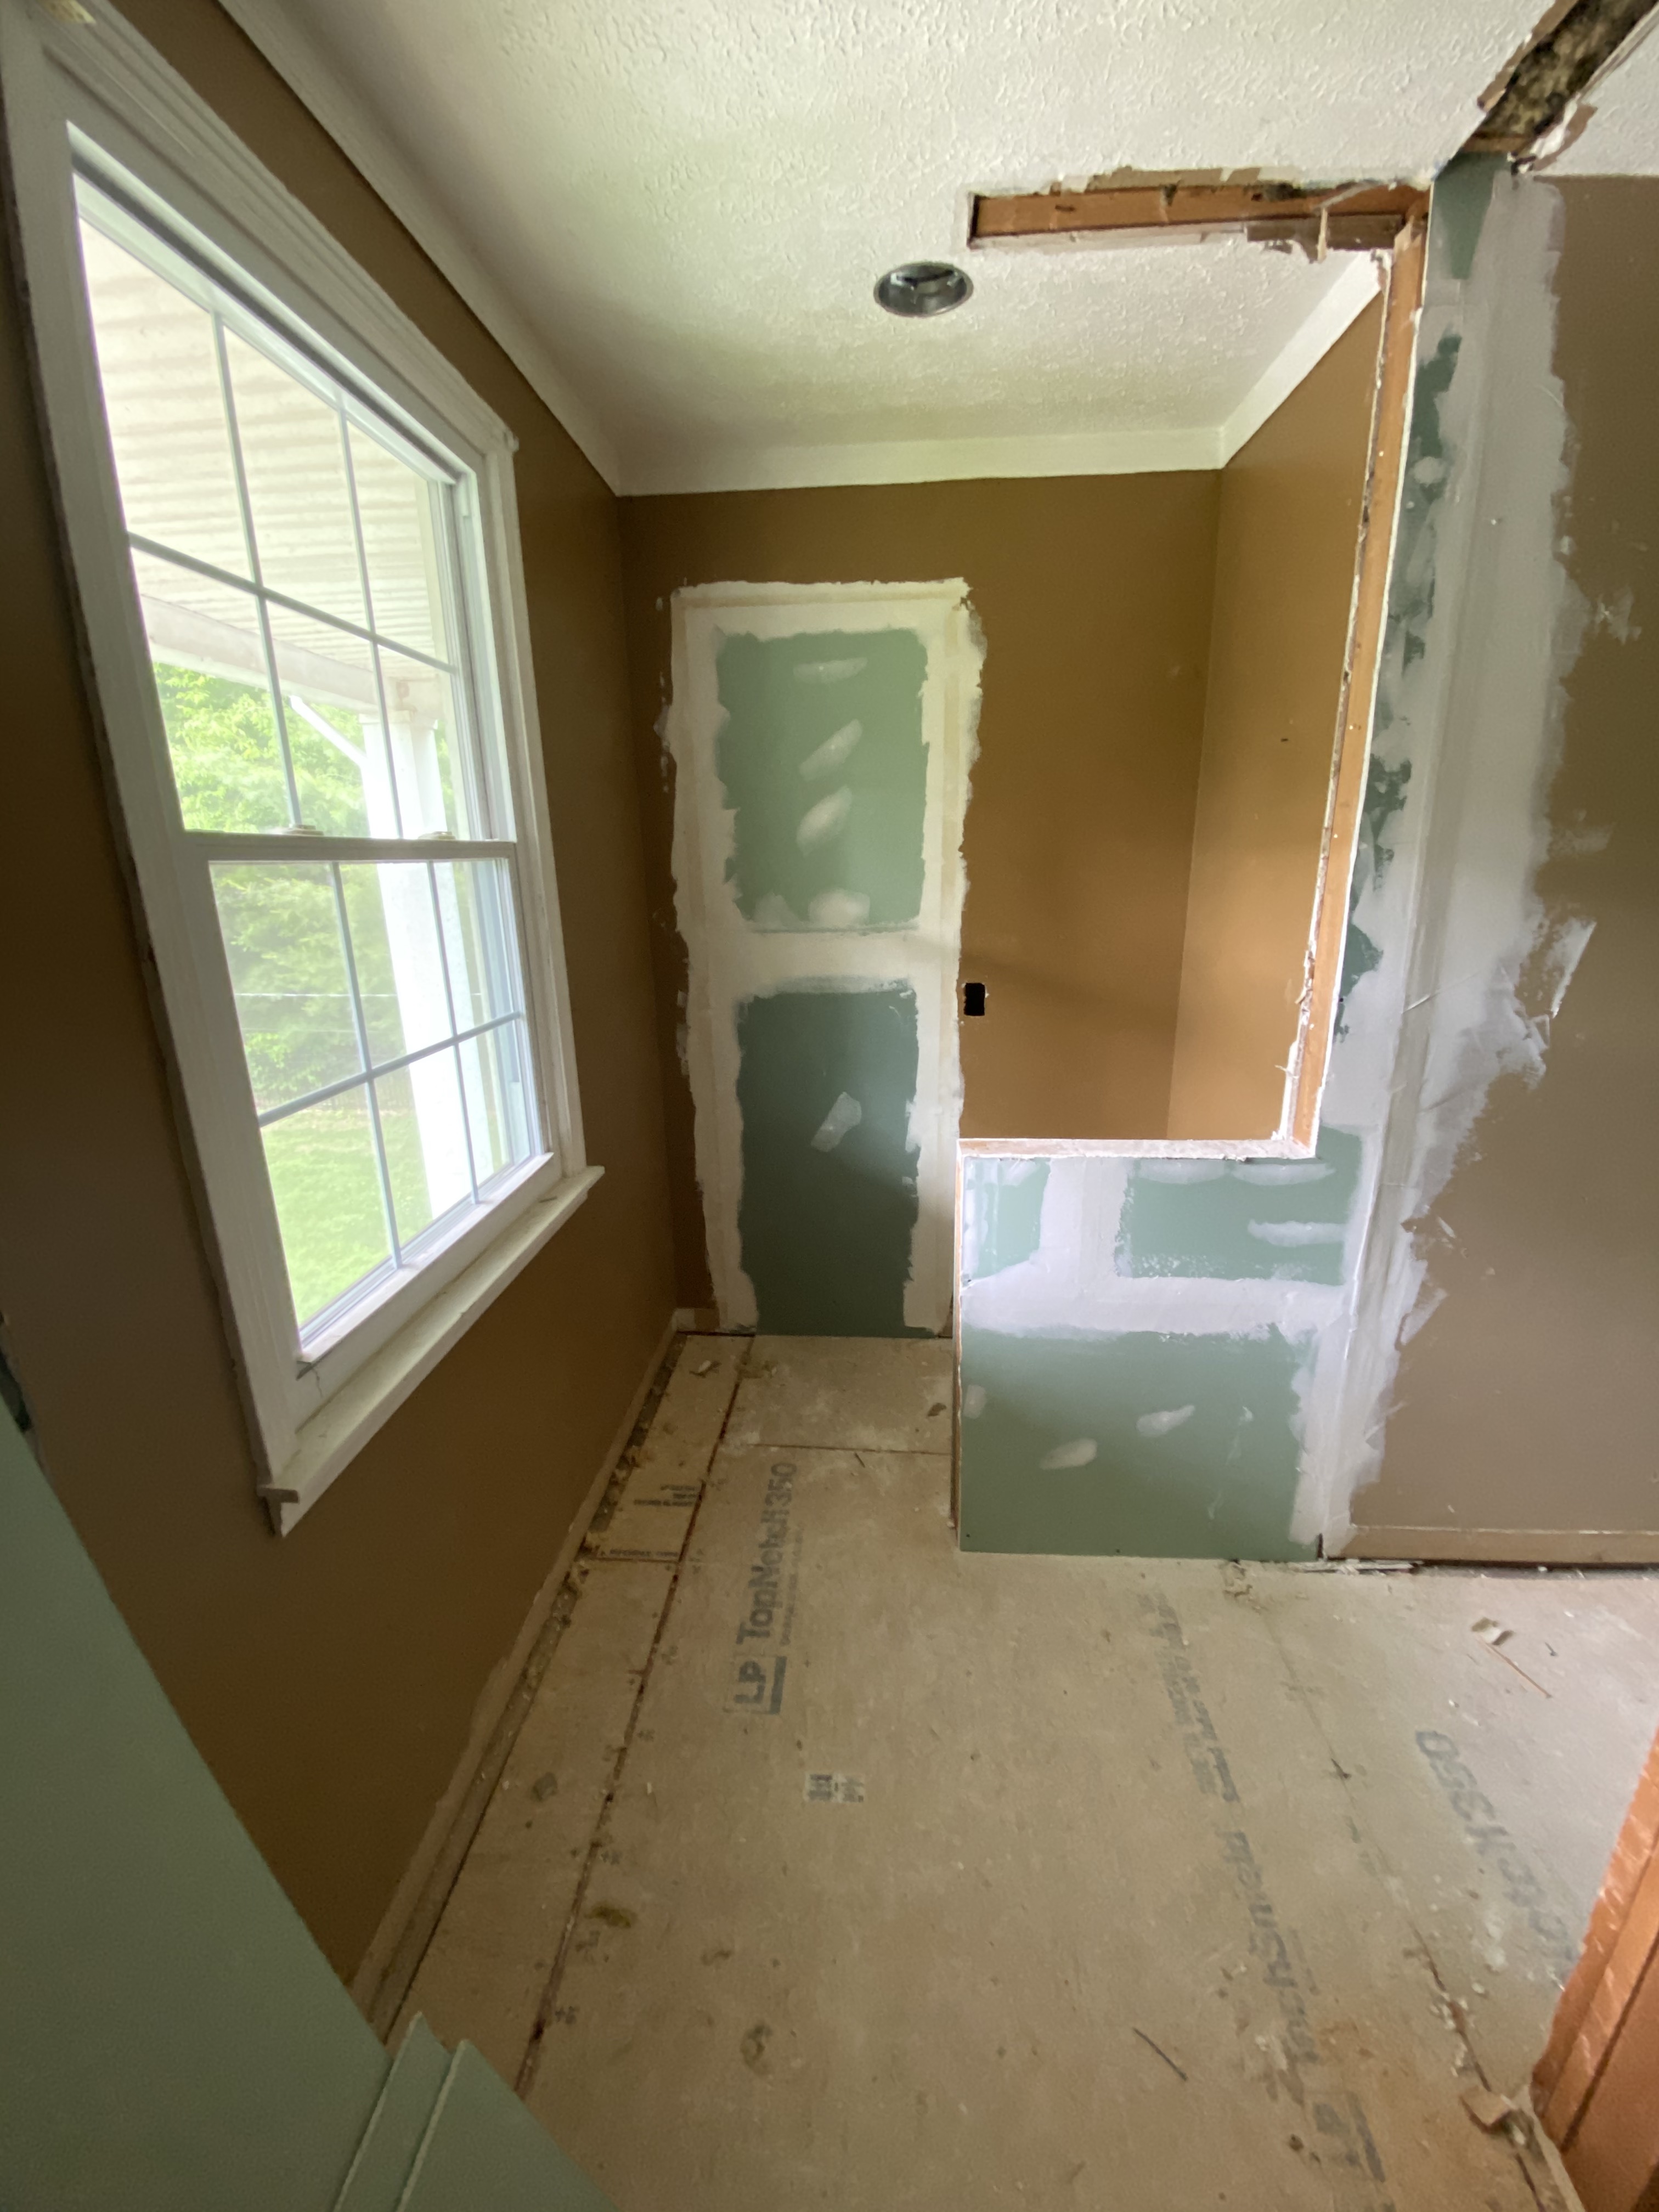
The master bath turned out to really be more of a new build than a remodel. We knew we wanted to at least fit a shower in and hopefully a double sink vanity if we could swing it. To make this happen, we added the closet area to bathroom real estate and created a new space between our room and Saylor’s nursery for a closet (not only did we obviously need a closet, but the room doesn’t count as a bedroom for resale unless there’s a closet!).

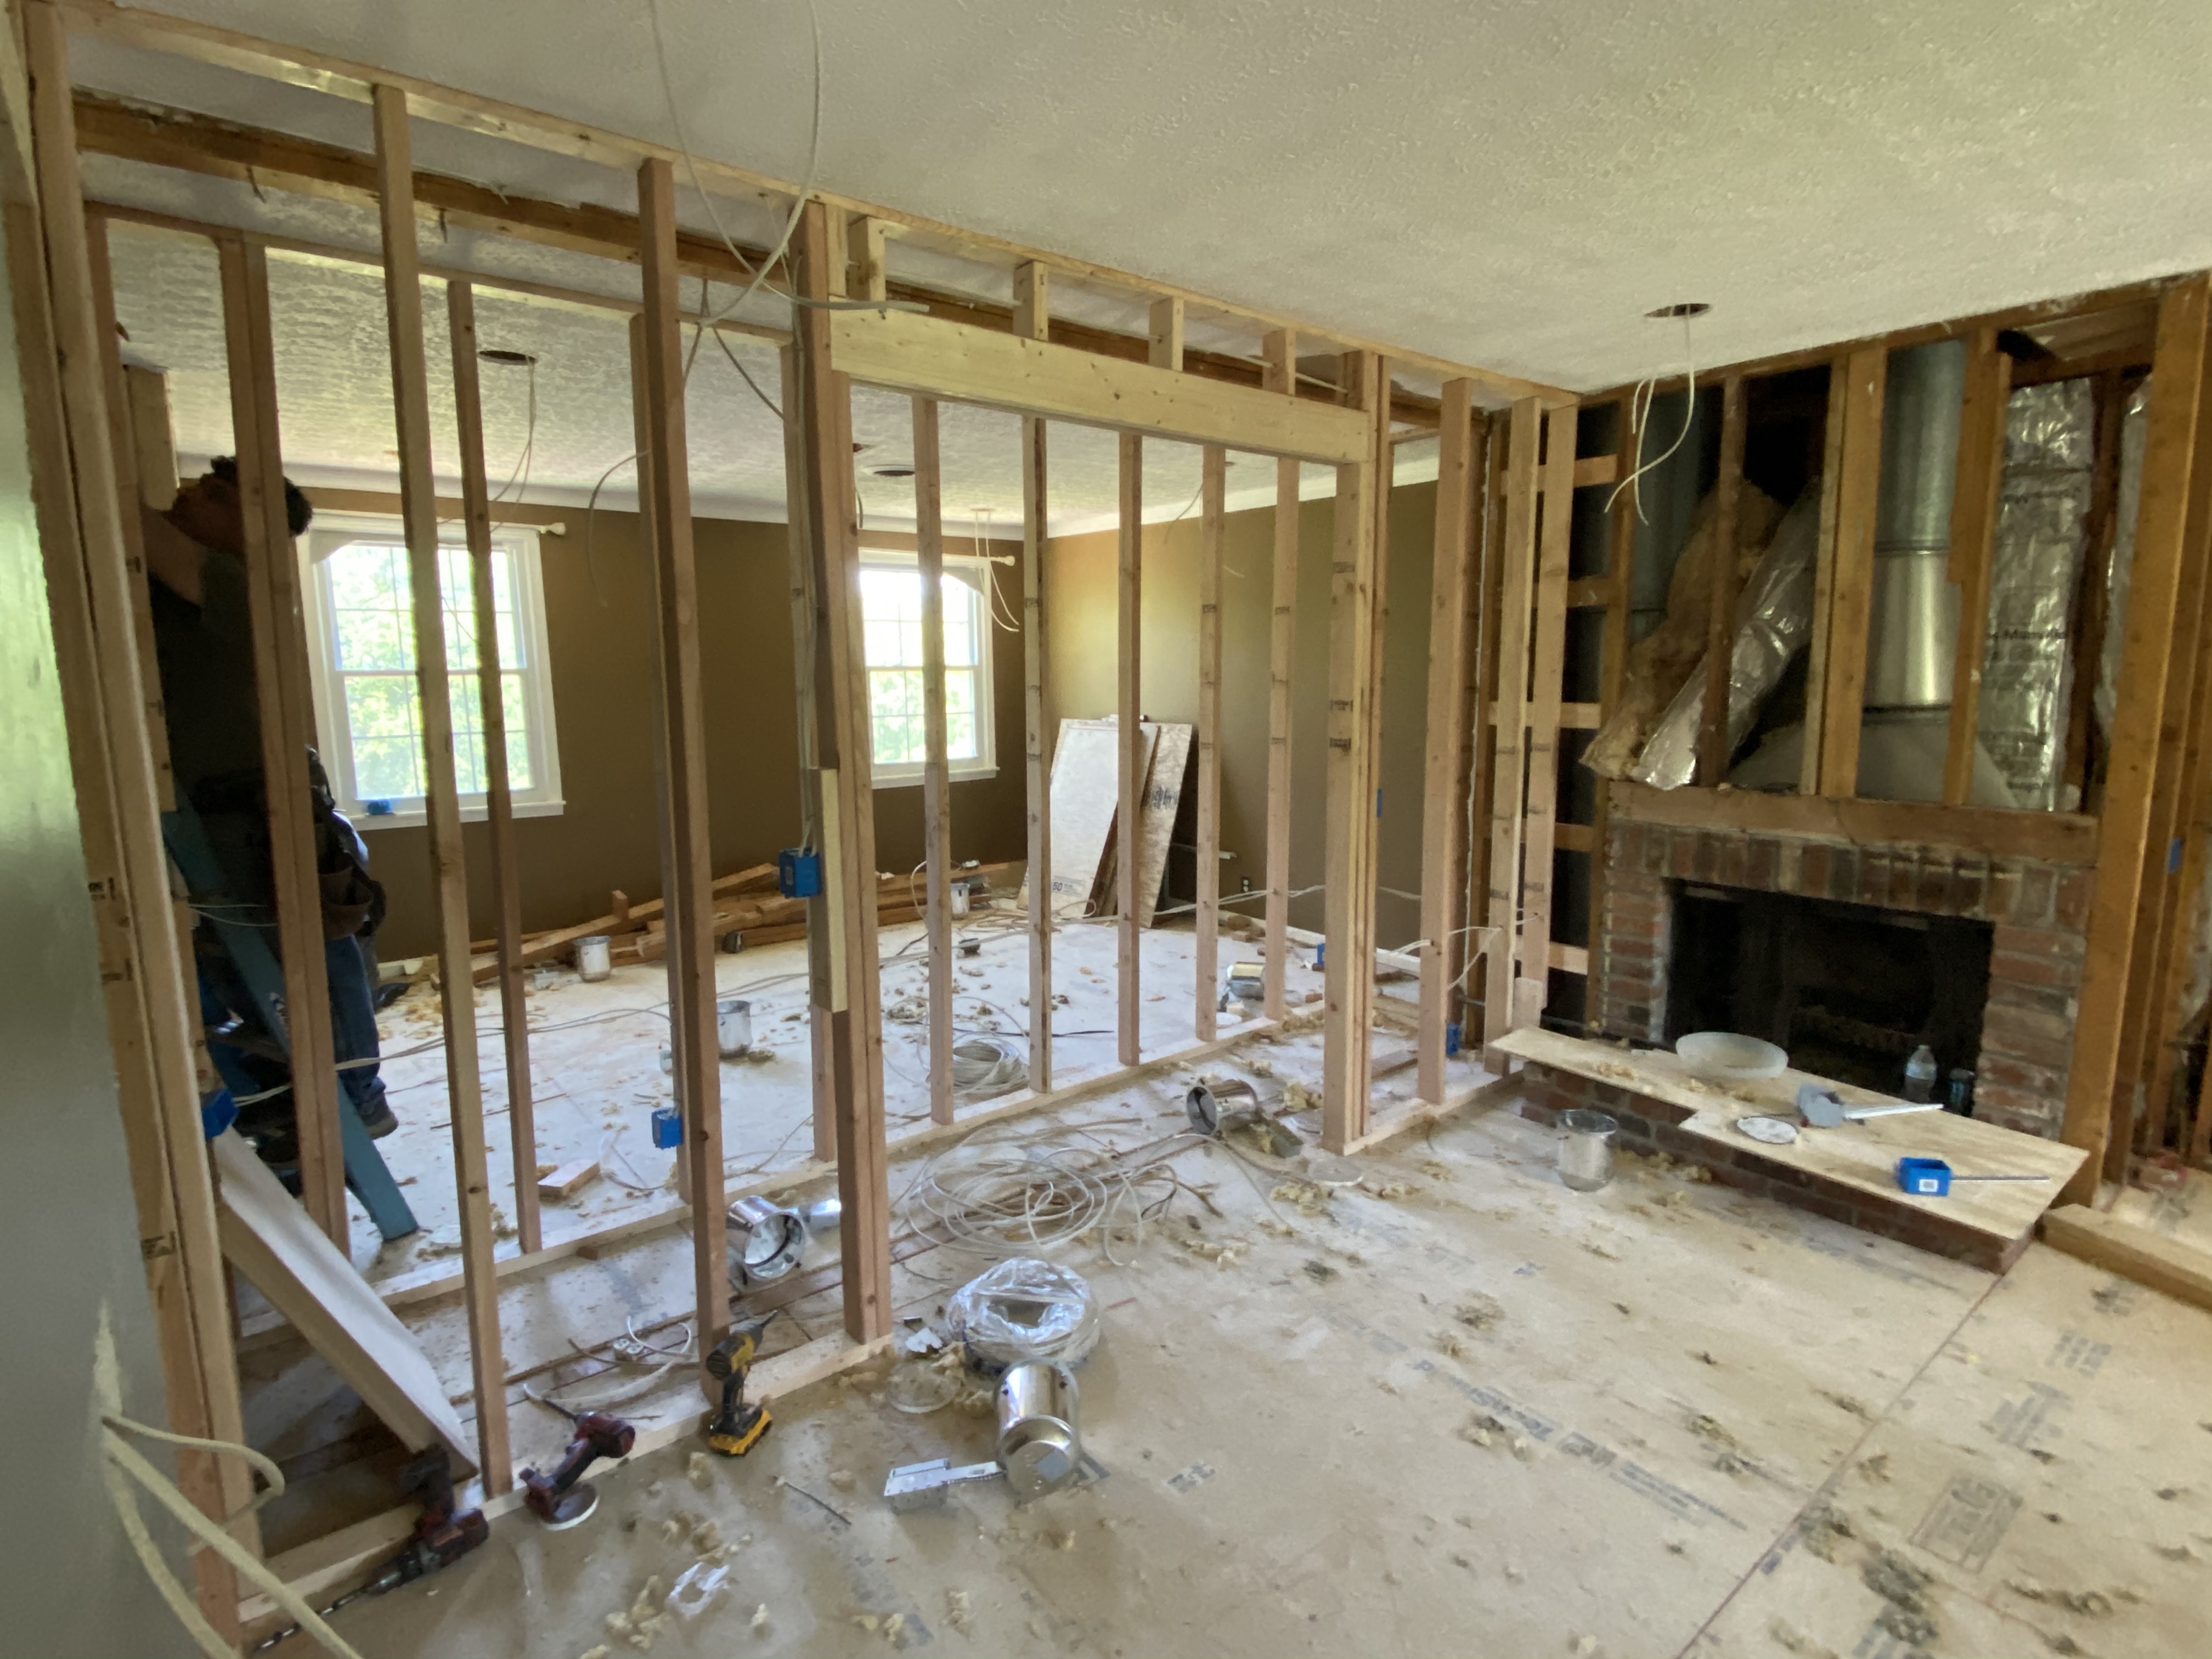
This required a lot of measuring and re-measuring. I didn’t want to sacrifice too much space from our room or Saylor’s, but also didn’t want a miniature closet. When we pulled the trigger on the layout, I was still a tad concerned the master bath would feel cramped and that our closet would be too small. Turns out it works pretty well! In the end, the bathroom was more important to me than the closet and the bathroom feels much more roomy than I was expecting. Our closet is functional but hardly a lavish master closet.
The bulk of the work (and the cost) of the whole project was in building the custom shower. This is no small feat when there was no shower in the space to begin with. We played around with the usable space quite a bit and then had plumbing ran, made several adjustments as to how it would actually go in the end, and finally had it tiled.
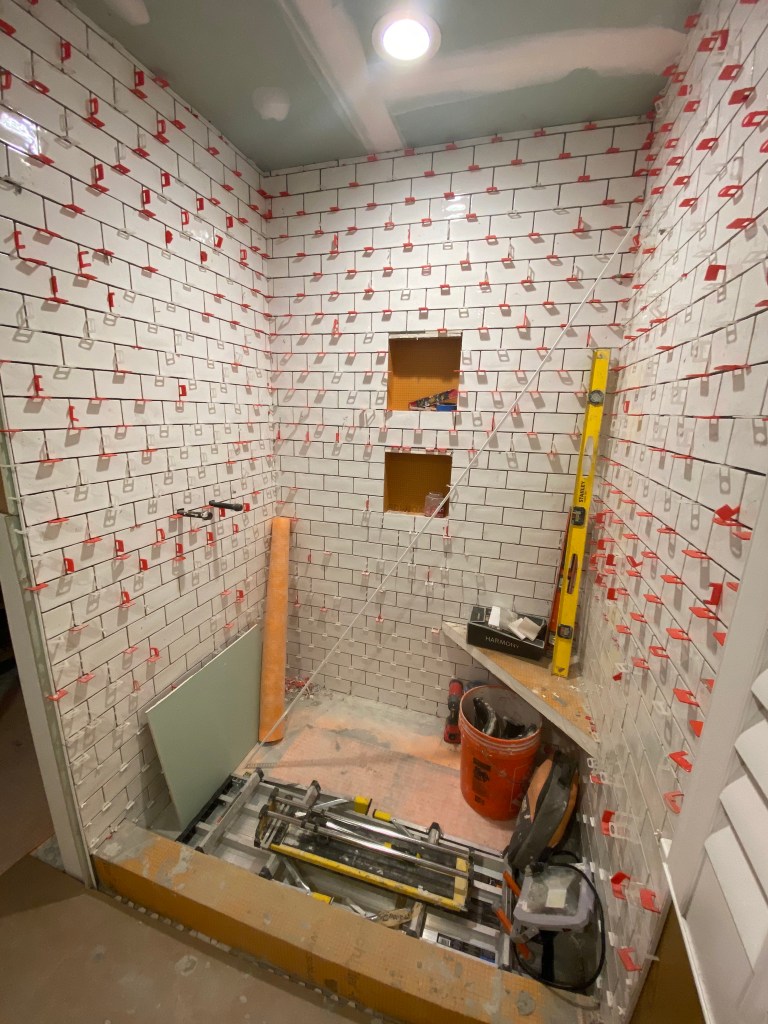
I am love with zellige Cle tiles and if cost wasn’t an issue, I would have gone with those in a heartbeat! This company has so many gorgeous shapes and hues – I’m in love! We weren’t in love with the price however. So I settled for this similar 3×6 ceramic white subway called Lancaster Bianco. It is shiny, clean, and undulated giving it some texture and depth. We decided to add a corner bench and two nooks.
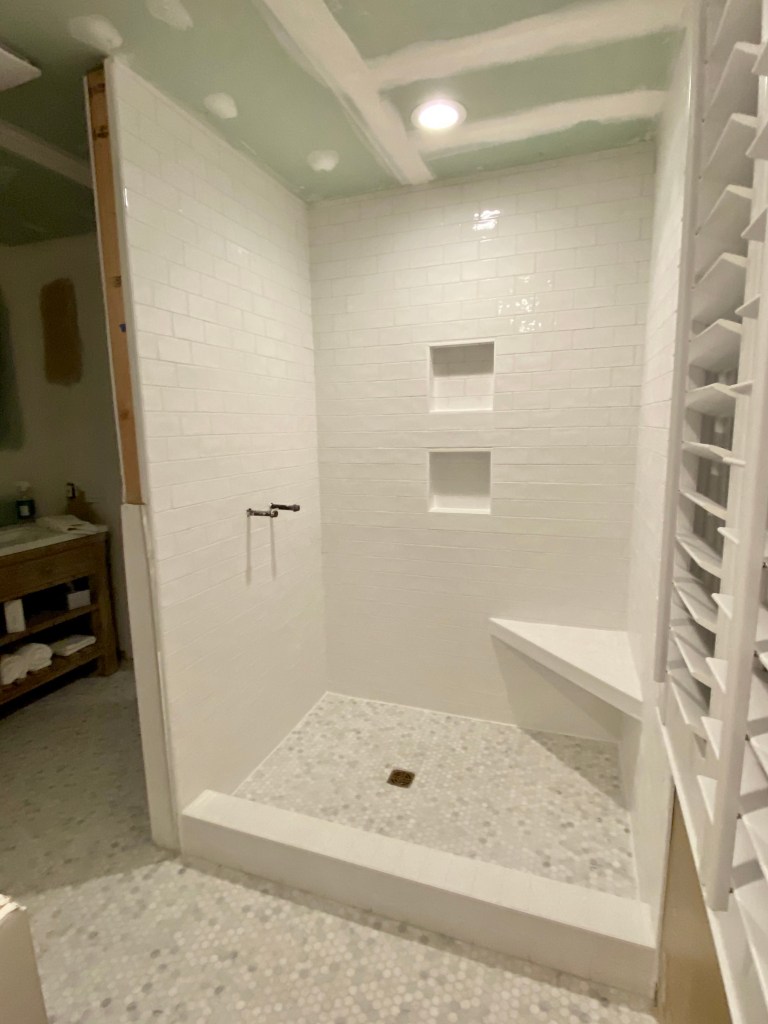
We debated about using the floor tile in the nooks but decided to keep it all crsip and white and I’m actually very glad we did this. There is plenty of diversity in the room as it comes together and keeping the same tile on the walls gives it a very clean look in my opinion. Sometimes I feel like mixing the tile too much yields a messy look in the end. We had the floor tiled with a small hexagon with various shades of neutrals, grays and pale blues. We used a silver sterling grout on the floor and bright white in the shower. I am super picky about “foot feel” on tile and am incredibly happy walking barefoot on both of our tiled bathrooms. We had a glass door installed and here is where I had to be little flexible (it’s ok, I’m a super go with the flow person so no biggie). I had originally wanted a frameless look. But…this is an old house and though the floor was leveled before the tile and half the walls rebuilt in there, we still weren’t dealing with angles perfect enough to forgo a frame. Next issue was I wanted to go with brass fixtures in there. Brass is complicated as I’m learning. Theres so many types…antique, aged, satin, regular…and they can vary in looks based on the quality of the fixtures too. Gah! After becoming pretty frustrated getting it all to match well enough, attempting to avoid the deep gold look and not spend a grip, the shower door sealed the deal to go with brushed nickel. It was just going to be too much of a “not quite right shade” of brass. I’m still mixing in a little brass here and there in the upstairs but the primary finish we went with is brushed nickel. The blessing in disguise was our vanity already came with brushed nickel knobs (maybe it was meant to be!). The shower isn’t quite usable yet because we keep changing our minds (and waiting on shipping…) for a fixture. But we have a new toilet and for the first time in our 11 year marriage, a double sink in our bathroom! I feel very spoiled and absolutely love it. There are no mirrors installed yet or lights above our vanity and I don’t even care. The walls are still brown and no trim work is done except for the ceiling which has been shiplapped.
I shopped for vanities a LOT. I found my first choice at Restoration Hardware. It was so not in the budget. Not even close. And Ronny kept reminding me: why would we put a RH vanity in a house that we don’t intend to be in forever? Well, because it is absolutely gorgeous, that’s why. Thankfully, I still have a little bit of my rational mental faculties left and kept looking for something similar at a better price and we totally found it. At Costco. Sometimes you just can’t beat it. This vanity is no joke – it’s called the Elbe Rustic. It has sold out a couple times. First, it’s very reasonably priced for what it is (1/4 the cost of my first RH choice!!).

Second, it comes in 4 different size/style options – two for double sinks and two for singles. We love it so much we ended up ordering a smaller single option for downstairs. Finally, it is incredibly solid and ridiculously heavy – which honestly is partly a con. When it was delivered, I watched helplessly to the side as the two young and quite strong delivery men STRUGGLED for a very long time to get it up our porch steps and into the living room. It was as if they had just done “Fran”, twice (the most well known CrossFit workout). I apologized, offered water, and then just watched as they leaned over in my living room and sucked air for about 5 minutes. “Any chance I can get you guys to just take it on up the stairs for me into the furthest part of the home?” Not sure they entirely got the humor. Ok well at least it was indoors. When Ronny got home I told him there was no way in hell I was helping him get it upstairs. He overestimates my strength and I get annoyed at his directional commands…
…it’s just not good for our marriage to move furniture together. So Ronny asked a coworker for help and I’m pretty sure he greatly downsized the magnitude of this favor. I had only met this guy one other time, when we first moved in and Ronny asked him for help moving our stupidly heavy piano out of our pod and into the garage. Ya, I’m pretty sure he hates us. It took them the better part of an hour and they were both super sore for days.
Shortly after we moved in, I did a quick sprucing up of the downstairs bath. We decided to hold off on remodeling this room for a year or two since everything was decently functional and we have other fish to fry with this house. The toilet was replaced before we ever moved in because that’s a must for me… not exactly something I want to “restore”, ever. The walls got painted (patent shade of brown to SW Alabaster). The vanity was in terrible shape, painted with a thick coat of gummy brown, covering even the hinges. The old sink was functional but fairly yucky and the counters are like the other counters of this blessed house: formica. I cleaned up the counter and sink the best I could, removed the cabinet doors, and painted the vanity a fun dark tropical green. We changed out the vanity light, had wood shutters added to the window and were just about to hang a new mirror…


…when the plumbing problem began. The problem began in our master bathroom right after our double vanity was installed and we began using the sinks up there. Every time we would turn them on for a few moments, water would begin bubbling up into our new shower and pooling. Good times. We have done a lot of work to the pipes at this point, including removing all of the old cast iron. The corrosion was extensive and the build up was to the point of leaving a straw-sized area where water could just barely seep through.

We have already cut away at several walls to get all of those nasty guys out and new PVC in… except, we learned, for one. One last pipe which was located behind the downstairs bathroom vanity. And this corroded pipe was inhibiting our upstairs sinks from draining, resulting in the water pooling in our shower. Which meant that our only option was removing this last (please -let it truly be the last) cast iron pipe. The downstairs vanity had been built onto the wall and was a complete piece of crap, which meant there was no way to remove it without fully demolishing it, leading to a now mostly gutted downstairs bathroom. We had that second Elbe Vanity from Costco we had already ordered, and so we installed this temporarily onto the awful floor in front of the drywall disaster so that we could have a usable sink. But after a few days of using it, we weren’t stoked with the small size of this vanity and realized it would be a bad idea to keep it if we also intended to remove that partition wall between sink and toilet in the future. So we decided to return it and go one size up. Ronny would just real quick knock down that partition wall and we could install the larger vanity (hehe). Sidenote: Ronny is a pro at returns. It is something he handles for our family because it stresses me out. We have done SO MUCH returning in the past year as I am extremely indecisive and it appears to be getting worse with age. Thankfully his return proficiency seems to be improving with age, so the situation is manageable. One night after the girls were in bed, around 8:30, Ronny excitedly announced he was going to demo the partition wall real fast so we could get the new bigger vanity in there.


The wall wasn’t structurally important but, these pipes sure were! So much for our super fast wall tear down. We are not touching the bathtub or the tile in the shower for now, but we are going to have the floor tiled in a few weeks. Then we can install the vanity and sink which is sitting in our living room at the moment. Update on this coming soon and hopefully the next time we revisit this bathroom saga, at least one of them will be finished (a girl can dream).


Omg love the changes happening! Did you shiplap or however it’s called the ceilings???
LikeLiked by 1 person
thanks! we did not install the shiplap ceilings ourselves but we are doing the finish detail & painting ourselves on that, which we haven’t done yet. we are really happy with the way it looks so far though!
LikeLike